The Joy of Yuzu: Japanese Recipes from Northern California

Yuzu, an East Asian citrus fruit ranging in color from a yellowish green to bright gold, is still not very well known in the United States. Which is a shame, since the sweet and tangy flavor is extremely palatable in any number of dishes from cocktails to jams, sauces, salads, and spreads. If you’re lucky enough to have access to at least a few, here are some recipes to make a cold day a little bit brighter.
When an email came across my inbox offering a yuzu cooking class at the East Bay home of a woman I knew through a network of Japan Exchange and Teaching (JET) Program participants in northern California, I fired off a reply to reserve a spot in the mid-December class. I had met Yuri Vaughn, an accomplished koto player, at a JET alumni gala a month prior for only a few minutes, but she was open and friendly and mentioned that she wanted to open her occasional cooking classes to our members who wanted to keep our connections with Japanese culture alive. When Yuri came down with a cold and we had to switch the date to right before Christmas, many of the registrants had to drop out due to prior holiday plans, which left myself and a fellow JET alumni, Andrea, as the sole participants. Yuri was kind enough to still offer the class as the yuzu season was coming to an end, which allowed Andrea and I to take plenty of photos and notes on the recipes she shared.
In San Francisco where I live, on the rare occasions when yuzu show up in the fruit section of the local Japanese grocery, they tend to cost nearly $2 per fruit at the time of writing this. My classmate Andrea found a source in the East Bay that offered them for $6 per pound, but clearly it’s worth noting that if you’re serious about eating them and live in the right climate, now is the right time to start preparing for your future happiness and start cultivating your own trees.
“I planted my yuzu trees the minute I heard they were FDA approved, but they’re very fussy and can take up to 18 years before the first crop of fruit. Luckily, mine did it in only eight years.” - Yuri Vaughn
The lack of access to fresh yuzu doesn’t stop American Japanese and Korean markets from carrying a variety of yuzu-based food products. The most common are probably ponzu (a yuzu-based condiment flavored with soy sauce, mirin, rice vinegar, bonito flakes, and kombu seaweed) and yuzu tea base (called yuja cha at Korean markets), a jam-like mixture of yuzu peels and pulp with honey or sugar which can be added to hot water to relieve sore throat pain or just give another non-caffeinated option to go with herbal teas. Both products are generally in the $5–10 range at most Asian groceries I’ve visited in the US, and last long enough to be worth the price. A rundown of yuzu’s uses and health properties can be found from Asian Food Grocer (page linked from the Internet Archive).

If you’re lucky enough to have access to yuzu in such bounty that bruised or just plain ugly fruit are on hand, it makes a wonderful addition to a hot bath as well — I almost cried to see a foot bath at a park in Hakone, Japan when I visited in 2007 that had dozens of yuzu floating in the water with lemon grass stalks.
As for those of us who have to rely on the kindness of others to source our fruit, I did my best to document everything that Andrea and I learned from Yuri earlier this month. As the yuzu season lasts for two to four months depending on the whims of weather and the trees themselves, these recipes combine both things that need to be eaten within a few weeks and some that could last for months in proper storage.
Since Yuri, Andrea, and I planned to make all four dishes in one afternoon, we went right down the list of recipes below in one shot. If you’re working with a lesser quantity of yuzu or time, I recognize that you may be forced to choose which to try. I’ve done my best to distinguish specifics for each recipe, but as we essentially started with a basket of yuzu and peppers and went with taste on some measurements, a little bit of faith is required.
Cooking with Yuzu
The recipes are presented below as we prepared them in one afternoon.
Equipment
Aside from the usual suspects (knives, cutting boards, bowls, measuring cups, etc.), here are a few specific things to have on hand.
Glass canning jars with lids: We used 6 of the smaller jam-sized jars (about 4–6 oz each) and 2 larger ones to hold the ponzu sauce, but your mileage may vary. There’s no rule on what size jars to use, but I think small is better. For the ponzu, you might want to transfer it to a taller bottle with a stopper once it’s been strained.
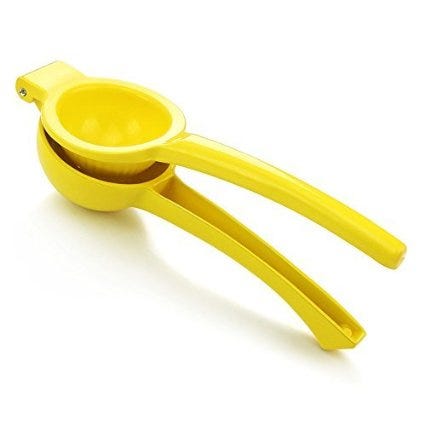
Citrus hand juicer: Yuri was a fan of the kind pictured here, which was incredibly easy to use (and was $8 on Amazon at the time of writing). A hand juicer is important because we’ll be using most parts of the fruit and need to separate them, so anything that renders the remaining fruit parts unusable is no good.
Canning tongs: If you plan to use the boiled water canning method to seal some of the products, some kind of tongs to move the jars into and out of the boiling water are required.

Wide-mouthed funnel: You will be filling jars and this will certainly help.
Preparing the Yuzu
It should be known that we were making all these recipes in a row, so it’s a bit difficult to specific exactly how many yuzu each individual recipe needs since we started by juicing about 20 of them and then separating the parts out. Each recipe has specific amounts for each part, but honestly, I’d say pick the recipe you most want to make and start with that one, then work with the leftover and ingredients you have on hand to use up the rest!
- Wash the yuzu and let them air dry for a bit.
- Cut the yuzu in half and hand juice them into a large measuring cup (should hold at least 2 cups of liquid). Save the juice.
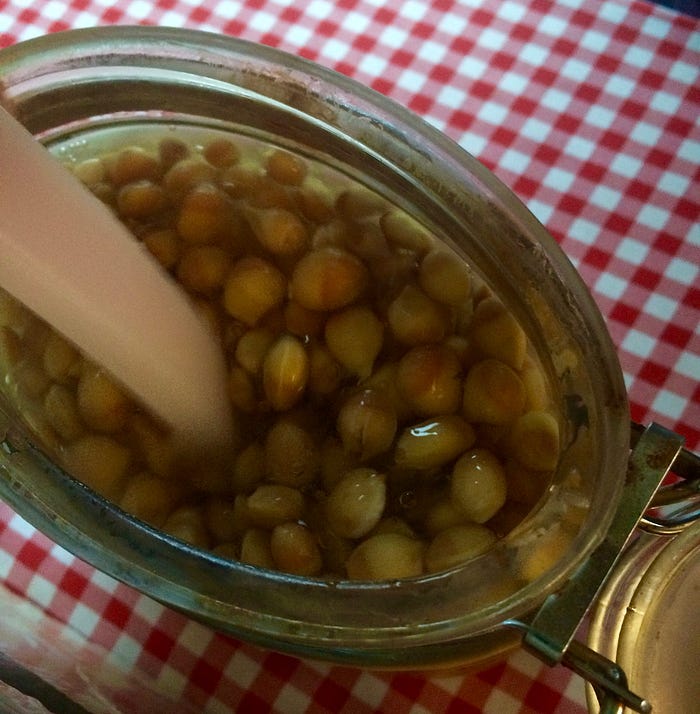
- Set the seeds aside.
- Option 1: Put them into a small resealable jar or container. Fill the jar with water and keep the seeds in the fridge for 1–3 days; as the water thickens from exposure to the seeds, you can rub it onto your skin as a great softening facial/toner treatment (plus you’ll smell amazing). You can replace the water after 3 days and keep this for about 1 week’s use before it goes bad.
- Option 2: Put most or all of the seeds into a Ziplock bag and store in the freezer to do option 1 later.
- Option 3: Try making your own yuzushu liquor - see the bottom of the page.
4. Take the fruit out of the hand juicer. Save the seeds in a bowl to the side. The inner pulp (the juicy, citrusy-looking part) should be scraped out with a knife and set aside in a bowl. The outer white layer of rind closest to the skin is more bitter, and it can be composted or saved and mixed with salt and miso to make a marinade for grilled saba (mackerel). The thin yellow outer skin pieces should be chopped into short, thin strips.


Yuzu kosho (Yuzu & hot pepper paste)
Before starting this recipe, you should prepare a large pot with at least a few inches of water for canning on the stovetop, and set out your glass jars (4 smaller jam jars will do) to be ready to be sterilized in the hot water when it’s time.
Ingredients
- Yuzu fruit, juiced and separated (described above).
- Shishito peppers (15–20)
- Jalapeño peppers (3–5)
- Serrano chili peppers (1–2)
- Sea salt
- Mirin
The pepper amounts above are Yuri’s recommendation, but the resulting yuzu kosho isn’t very spicy; some the Japan-made brands I have tried pack much more punch. I’d say maybe taste it after you do step 6 below and if it’s not spicy enough for you, add more.
- Follow the steps above in the “preparation” section to prepare the yuzu.
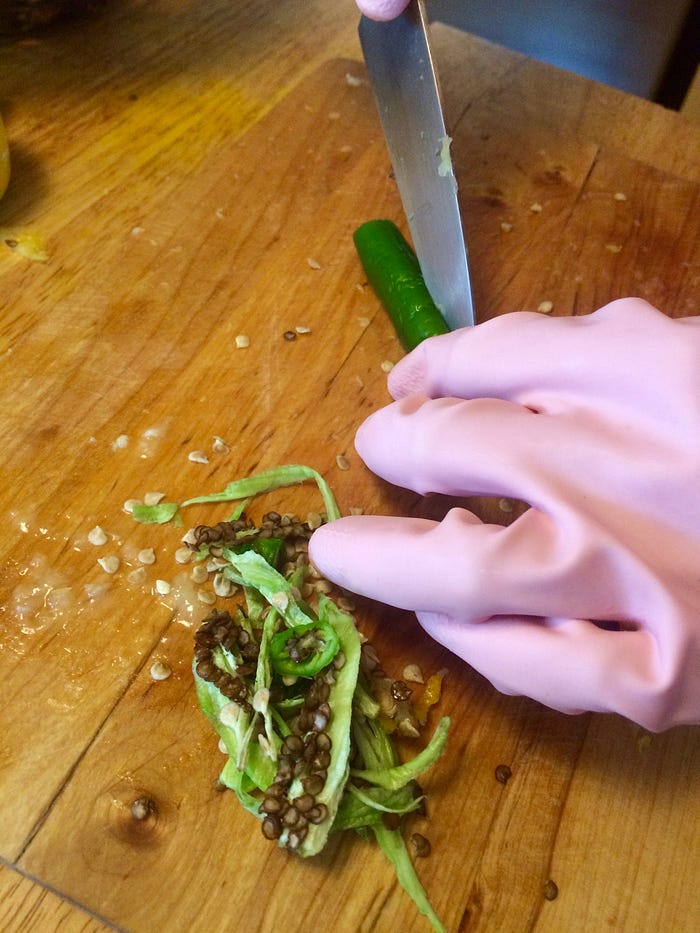
- Take the shishito peppers and cut off the tops. Slice them down the side and remove the seeds, then chop the pepper flesh into small pieces. (Shishito are rarely spicy, but you may want to wear gloves while you cut all the peppers.) Do the same with the jalapeños and serrano chilis.
5. In a glass measuring cup, fill to the 200–250 cc/mL mark with chopped yuzu peel and shishito peppers, and 200 cc/mL of chopped jalapeño and serrano chili. * Yuri described this as “about 200 g of yuzu peel, 200–250 g of peppers”, but as it was all eyeballed, I suggest that 50–50 is a nice balance.


6. Put the yuzu/pepper mixture into the food processor (should be about 450 g total) and add 10% of the yuzu/pepper weight in sea salt (so, about 45 g if 450 cc) and about 60 mL of the yuzu juice and 40 mL of mirin. Pulse until the big chunks are gone but there is still some texture.


7. On the stove, start boiling the water bath for the jars, and put the empty jam jars into the water sideways and roll around to “wash them out” and quickly sterilize them. Remove them with the tongs and set the funnel on top of the jar. (Careful, it may be hot to the touch!)

8. Transfer the mixture from the food processor into the jars, filling about 90-95% of the way. Set the canning lids on top and carefully set the jars standing up into the water bath. Boil for 7–10 minutes until fully sealed - monitor their progress as ideally you want to remove them before the bright green color fades.
9. The jars can now be stored in the fridge for use. Yuri recommends that you start eating it within 1–2 weeks, and that once it’s opened, it will last in the fridge for 2–3 months. (Please follow safe canning practices or research them if unfamiliar!)
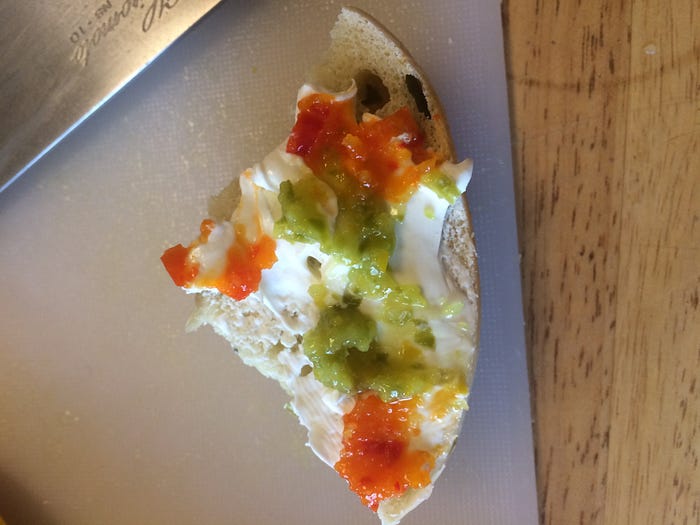
How to eat: Anywhere you want a salty/spicy/sweet and sour flavor will do! Yuri recommended to put it on top of bagels with cream cheese, I like to mix it into Asian soup broth (pho, udon, soba) for a little extra flavor.
Yuzu jam

Ingredients
- Yuzu pulp (saved from earlier)
- Yuzu peel, julienned (saved from earlier)
- Yuzu juice (saved from earlier)
- Raw sugar
- Rock sugar (see image)
Here is another point of caution: Yuri had us make two different versions of the same jam. The first style was sealed on the stove in traditional canning fashion. The second type followed the same basic steps but uses rock sugar as well as raw sugar, and is meant to be left to sit for about 1 week until all the sugar dissolves. If you choose to make only one type, follow the appropriate steps.
Version 1: Canned and sealed yuzu jam
Note that the amounts of yuzu are again a bit mysterious - Yuri was good enough to eyeball all of this and often we’d step backwards to figure out the weights, so my advice again is “follow my guesses and then prep a bit more if needed.”


- Take the yuzu pulp you had set aside and go through it to remove all the stringy white bits. Throw those strings away.
- Taking about 50% of the julienned yuzu peel (start with about 100 cc, add more later if you need it), boil it in a small pot for about 3 minutes to remove the bitterness. Drain the peel and put it back in the pot.
- Add yuzu pulp and raw sugar to fill the pot with the peels to a total of about 200 cc total. Add 3 teaspoons of yuzu juice, and cook over low heat until the sugar dissolves, stirring with a wooden spoon.
- Prepare the glass jam jar(s) in the water bath to sterilize, and then place the funnel on top. Add the jam mixture to the jar(s) and seal with a lid, then place in the canning water bath upright for about 10 minutes to seal.
- The jam is ready to eat! Store or enjoy it.


Version 2: Raw jam, 1 week waiting period
- Boil the glass jar(s) in the canning bath for a minute to sterilize.


2. Put in layers the following: yuzu pulp, yuzu peel (doesn’t need to be boiled first), and chunks of the rock sugar. (You may need to prep more fruit at this point if you’re running low on stock.) Keep layering until the jar is almost full.
3. Add 4–5 teaspoons of yuzu juice and 1 tablespoon of raw sugar to the top of the mixture, plus a little bit of juice over the raw sugar to help it dissolve faster.
4. Close the jar and let it sit for about 1 week to fully melt together. Once open, it lasts about 1 month in the fridge. (You may want to store it in the fridge from day 1, but Yuri wasn’t specific about this.)
How to eat: Yuzu jam is delightful as a jam in it’s own right, or for an even nicer treat, put a heaping tablespoon into the bottom of a small mug or teacup and add some honey, then pour hot water over the mixture and stir to make your own yuzu cha / yuja cha!

Ponzu sauce
This is Yuri’s method for making ponzu. It seems that you can also combine all the ingredients minus the citrus juices, following the directions below, then add the citrus juices after straining out the kombu and bonito flakes after 24 hours in the fridge. I think it tasted fine either way!
Ingredients
- Lemon juice (150 mL)
- Yuzu juice (100 mL)
- Low sodium soy sauce (250 mL)
- Rice vinegar (3–4 tablespoons)
- Mirin (200 mL)
- Bonito flakes (katsuo bushi) (1 large handful)
- Kombu seaweed (optional, 3–4" long piece)
- On the stove, boil the mirin for a few minutes to cut down the alcohol content. After it boils, turn off the heat and add the rice vinegar. Stir and pour into a deep bowl.
2. In a measuring cup, combine the lemon juice and yuzu juice to the correct levels. Transfer to the bowl with the mirin/rice vinegar/soy sauce mixture.
3. Add the handful of bonito flakes and the piece of kombu to the mixture and stir.

4. Put the funnel over the jar(s) and pour the mixture into the jar(s) until 3/4 full.
5. Allow the mixture to sit in the fridge for at least 24 hours, then strain with cheesecloth (or a fine sieve) into a bowl and put back into the jar(s).
6. Store in the fridge. Best if used within a month of making.
How to eat: I like to put ponzu on almost anything I’d use normal soy sauce on, but traditionally it’s often used as a marinade/dressing for grilled meat or fish, as a dip for tempura, shabu shabu, or sashimi. I love it on noodles as well, as it makes a really flavorful broth when combined with a meat or fish stock!
Yuzushu
Yuri was kind enough to send me home with an extra yuzu, which I was worried would go bad before I thought of something worthy. So I took a bottle of shochu that I had brought back from Fukuoka this summer and a jar. Using all of the yuzu seeds I saved, I added one yuzu’s worth of chopped peel and pulp, plus a few tablespoons of raw sugar and filled the rest of the jar with the shochu liquor. I’m going to let it sit in my fridge for a few weeks and see how it is. [Edit: It was very tasty. Cheers!]


If you make it through all these recipes (and lucky you for having so many yuzu at hand!), I hope you can enjoy the delightful collection of yuzu products! Yuri also gave each of us one of the preserved yuzu she had been aging for a few months out in her garden, stuffed with chopped chestnuts and miso. They are salty and sweet and go wonderfully with a cup of genmaicha barley tea. Too bad I don’t have better instructions on how to make them, but it’s nice to know that the possibility exists.

My sincere thanks to Yuri Vaughn for the wonderful lesson, generosity in sharing her yuzu harvest, and fantastic and friendly advice! Any mistakes, errors, or unclear notations in the recipes are mine, not hers; please feel free to share your own insights or comments.